How to Cancel or Delete Orders in Shopify – Step-wise Tutorial
You may need to cancel or delete Shopify orders in various circumstances.
Let’s say a customer placed an order accidentally or didn’t want the product anymore. Or maybe you messed up with the stock management, and the ordered product is unavailable. In any of the above cases, order cancellation or deletion is necessary.
By default, there is no option for the customers to cancel the orders from the front end. However, the customers can contact you to cancel or delete their orders from admin.
In this post, find the complete steps to cancel or delete orders in Shopify.
How to Cancel an Order on Shopify?
From the Shopify admin, you can cancel both fulfilled and unfulfilled orders.
To cancel an order on Shopify, follow these easy steps:
- Step 1: Select the Order in Shopify Admin > Orders
- Step 2: Go to More Actions > Cancel Order
- Step 3: Confirm Order Cancellation
Step 1: Select the Order in Shopify Admin > Orders
In the admin panel, click Orders in the left menu. The list of orders in the store will appear on the screen.
Now, select the order that you want to cancel in Shopify.

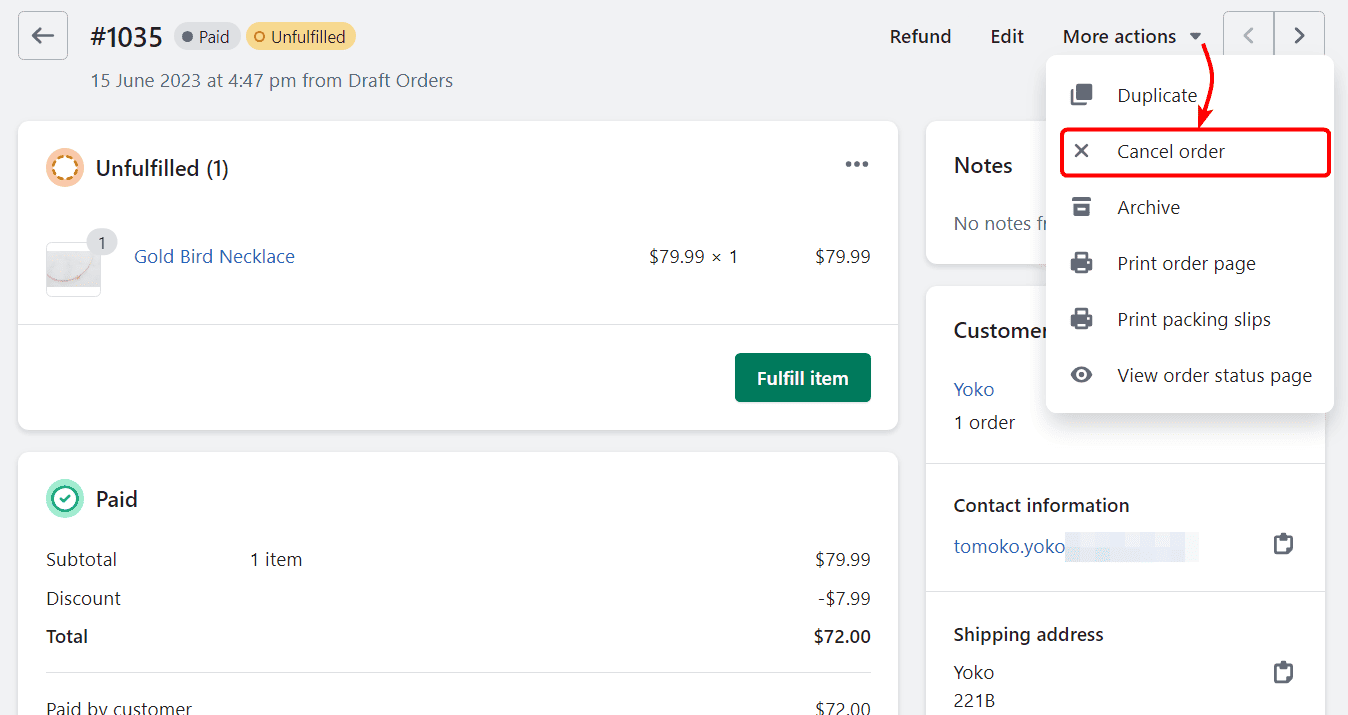
Step 2: Go to More Actions > Cancel Order
Now, on the order screen, click on the More Actions present in the top-right corner and click Cancel Order in the dropdown.
Step 3: Confirm Order Cancellation
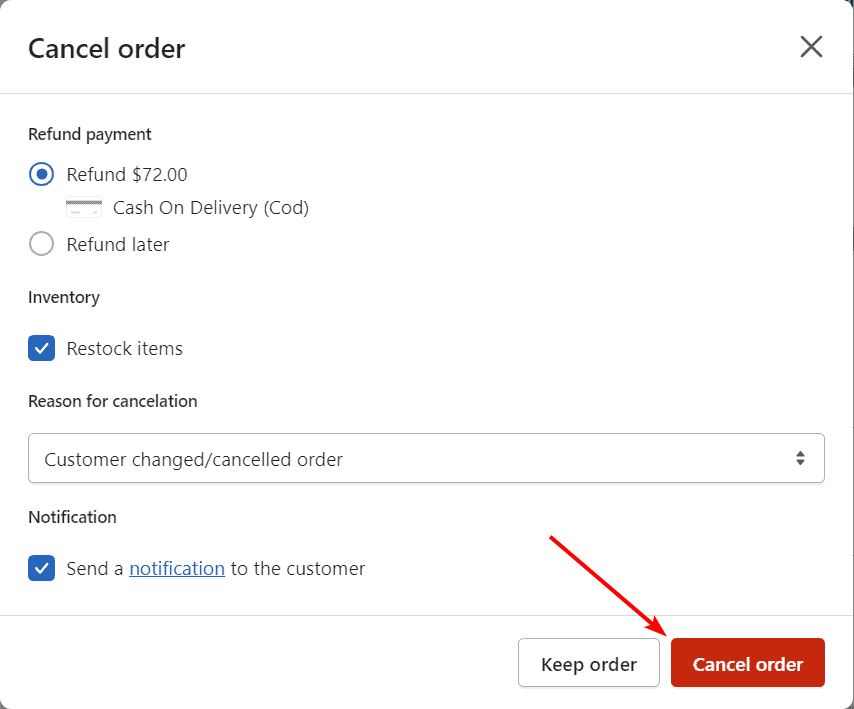
Now, an order cancel confirmation pop-up will appear on the screen.
Here, you can choose the following options:
- Refund payment: Choose to refund the payment now or later.
- Inventory: Choose to restock the items in the order.
- Reason for cancelation: You can choose the cancellation reason.
- Notification: Tick the box to send a notification about order cancelation to the customer.
Click the Cancel Order button at the bottom right to confirm order cancellation in Shopify.
Woohoo!! 🎉 You’ve successfully canceled the order in Shopify.
You can still find the canceled order in Shopify. It will appear in a strike-through format in the Orders list.
The order status is also changed according to the refund option you selected.

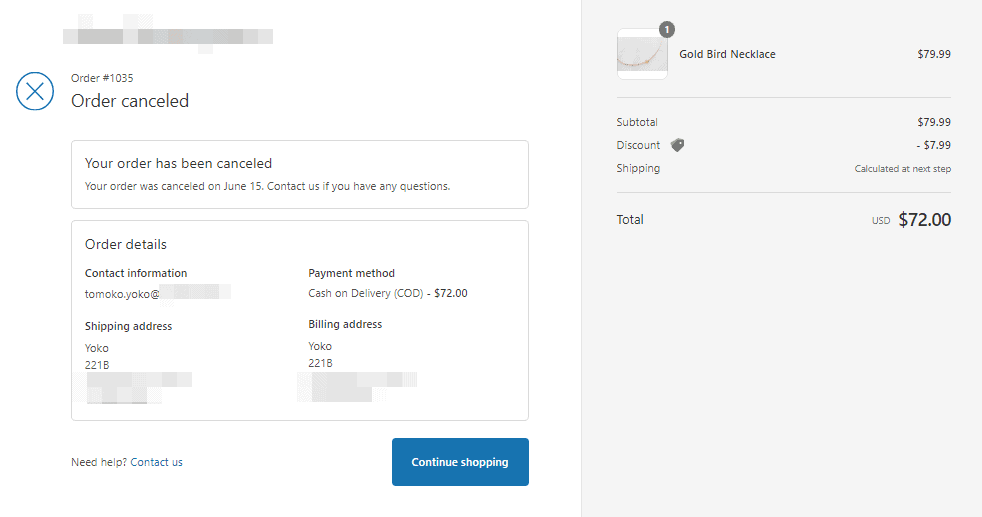
The customer-side order status page is also updated.
For example, the order status page now displays ‘Order has been canceled.’
In case of partial refunds during the order cancellation, you can follow the above steps to issue the remaining refunds to the customers also through the same steps.
Be cautious with the refunds, as they are irreversible!
How to Delete an Order on Shopify?
In Shopify, you can delete an order that has been canceled or fulfilled.
To delete an order in Shopify, follow these steps:
- Step 1: Select the Order in Shopify Admin > Orders
- Step 2: Scroll Down & Delete The Order
- Step 3: Confirm Order Deletion in Shopify
Step 1: Select the Order in Shopify Admin > Orders
In your Shopify admin, go to Orders in the left menu, and select the order that you want to cancel.
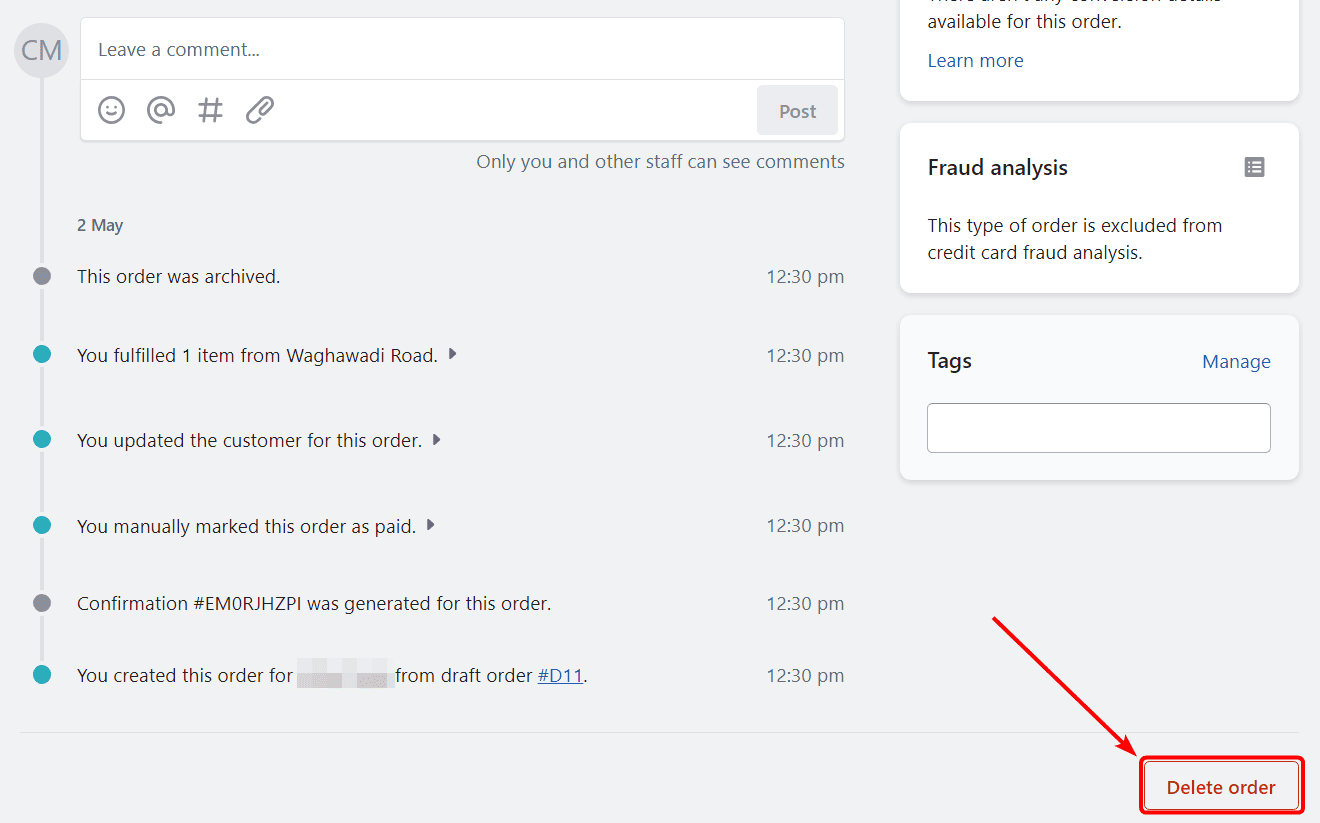
Step 2: Scroll Down & Delete The Order
Now, on the order details page, scroll down and click the Delete Order button in the bottom right corner.
Step 3: Confirm Order Deletion in Shopify
Now, an order delete confirmation pop-up will appear on the screen.
Click Delete order to confirm the order deletion.
(Be cautious while deleting orders in Shopify, as they can not be recovered!)
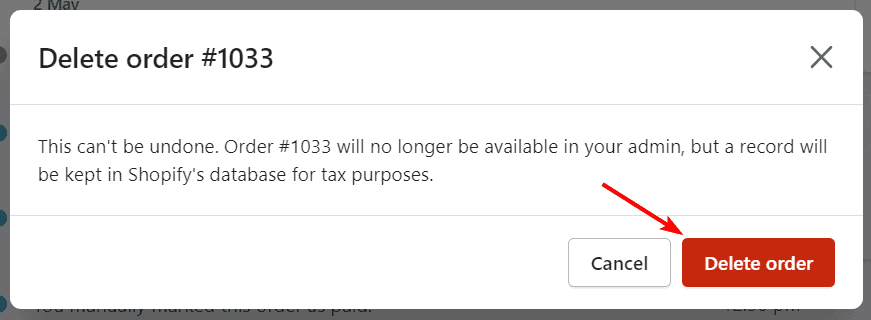
Voila!! You’ve successfully deleted the order in Shopify.
(You’re getting better at the Shopify platform 🚀)
Other Useful Resources
In this micropost, I showed you complete step-wise methods to delete/cancel orders in Shopify. I hope it has added to your Shopify management knowledge. If you’re new to Shopify platform, here are some other interesting reads for you:
- How to Add Terms and Conditions to Shopify
- How to Drive Traffic to Your Shopify Store
- How to Import Products to Shopify Using CSV
- Remove “Shipping Calculated at Checkout” Shopify
- How to Cancel Shopify Subscription? – Easy Step-wise Tutorial
- How To Remove Return To Cart From Shopify Checkout Page
- Cancel Shopify App Subscription?
Well, that’s all for now!
Ciao 🙂
Sanjay Jethva
Sanjay is the co-founder and CTO of Meetanshi with hands-on expertise with Magento since 2011. He specializes in complex development, integrations, extensions, and customizations. Sanjay is one the top 50 contributor to the Magento community and is recognized by Adobe.
His passion for Magento 2 and Shopify solutions has made him a trusted source for businesses seeking to optimize their online stores. He loves sharing technical solutions related to Magento 2 & Shopify.


Prev
How to Create Custom Product Attribute Using Data Patch in Magento 2
Learn to Create Order in Magento 2 Admin Panel
Next