How to Add Snowfall Effect to Shopify? (Code Snippet)
Preparing your Shopify store for Christmas? Learn here to add snowfall effect to it.
Adding the Shopify Snow Effect can make your store vibe with the winter shoppers. There are plenty of Shopify apps to do that, but if you’re looking for a direct method, this post is for you.
I’ll share the step-by-step method to add the Shopify snowfall effect, including code snippets. This tutorial does not require you to be a coding pro, but you need a basic understanding of editing Shopify theme codes.
Let’s clear a few basics.
What is Shopify Snowfall Effect?
Shopify snowfall effect is the visual animation added to stores during holiday season (like Christmas), typically during December and around New Year. It simulates falling snowflakes on the website, creating a festive and seasonal atmosphere for the shoppers.
For example, here’s what it looks like:

In this post, we’ll learn to add free snow falling effect on Shopify without using any app.
How to Add Snowfall Effect to Shopify?
You can add Christmas snow falling effect to Shopify store by modifying the theme files and adding custom code snippets. Here’s a quick overview of the process:
- Step 1: Add a Custom Snippet
- Step 2: Define Settings Schema
- Step 3: Render the Snowfall Snippet in the theme.liquid File
- Step 4: Customize the Snowfall Effect in Shopify Theme Editor
Let’s go through each of the steps in detail.
Step 1: Add a Custom Snippet
In Shopify admin, go to Sales Channels > Online Store > Themes and click the three dots beside the customize button.
In the dropdown menu, click “Edit code.”

Now, the Shopify theme code editor will open.
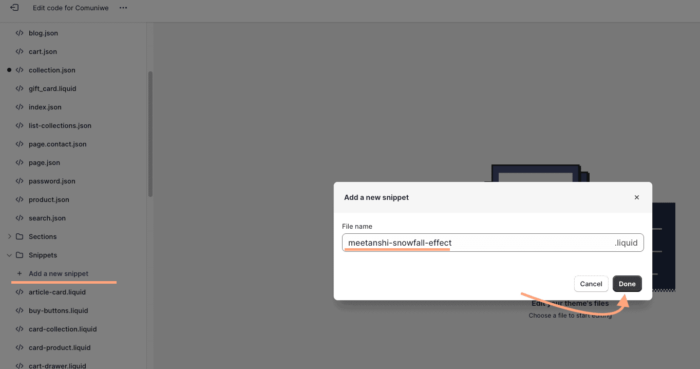
In the left menu, scroll down to the Snippets and click “Add a new snippet.”
Enter the snippet name as “meetanshi-snowfall-effect” and click “Done.”
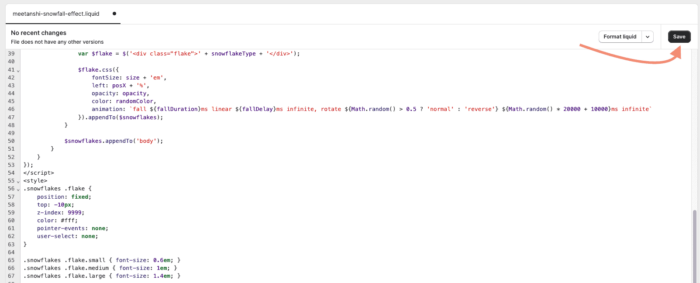
Now, paste the following code in the meetanshi-snowfall-effect.liquid file:
|
1 2 3 4 5 6 7 8 9 10 11 12 13 14 15 16 17 18 19 20 21 22 23 24 25 26 27 28 29 30 31 32 33 34 35 36 37 38 39 40 41 42 43 44 45 46 47 48 49 50 51 52 53 54 55 56 57 58 59 60 61 62 63 64 65 66 67 68 69 70 71 72 73 74 75 76 77 78 79 80 |
<script> document.addEventListener("DOMContentLoaded", function() { var script = document.createElement('script'); script.src = 'https://code.jquery.com/jquery-3.6.0.min.js'; script.type = 'text/javascript'; document.getElementsByTagName('head')[0].appendChild(script); script.onload = function() { var winterModeEnabled = {{ settings.winter_mode | default: true }}; if (winterModeEnabled) { var minSnowflakeSize = parseFloat({{ settings.min_snowflake_size | default: 0.6 }}); var maxSnowflakeSize = parseFloat({{ settings.max_snowflake_size | default: 1.4 }}); var gravity = parseFloat({{ settings.gravity | default: 1 }}); var snowflakeColors = [ '{{ settings.snowflake_color_1 | default: "#ffffff" }}', '{{ settings.snowflake_color_2 | default: "#f5fbff" }}', '{{ settings.snowflake_color_3 | default: "#e7f5ff" }}' ]; // Clear previous snowflakes $('.snowflakes').remove(); // Generate and append new snowflakes based on the "Number of Snowflakes" setting var $snowflakes = $('<div class="snowflakes" aria-hidden="true"></div>'); var numSnowflakes = {{ settings.num_snowflakes | default: 50 }}; for (var i = 0; i < numSnowflakes; i++) { var size = minSnowflakeSize + Math.random() * (maxSnowflakeSize - minSnowflakeSize), opacity = Math.random() * 0.7 + 0.3, posX = Math.random() * 100, fallDelay = Math.random() * 5000, fallDuration = (Math.random() + 0.5) * 10000 / gravity; var snowflakeType = '{{ settings.snowflake_type | default: "❄" }}'; var randomColor = snowflakeColors[Math.floor(Math.random() * snowflakeColors.length)]; var $flake = $('<div class="flake">' + snowflakeType + '</div>'); $flake.css({ fontSize: size + 'em', left: posX + '%', opacity: opacity, color: randomColor, animation: `fall ${fallDuration}ms linear ${fallDelay}ms infinite, rotate ${Math.random() > 0.5 ? 'normal' : 'reverse'} ${Math.random() * 20000 + 10000}ms infinite` }).appendTo($snowflakes); } $snowflakes.appendTo('body'); } } }); </script> <style> .snowflakes .flake { position: fixed; top: -10px; z-index: 9999; color: #fff; pointer-events: none; user-select: none; } .snowflakes .flake.small { font-size: 0.6em; } .snowflakes .flake.medium { font-size: 1em; } .snowflakes .flake.large { font-size: 1.4em; } @keyframes fall { 0% { opacity: 0; } 10% { opacity: 1; } 90% { opacity: 1; } 100% { top: 100%; opacity: 0; } } @keyframes rotate { 0%, 100% { transform: rotate(0deg); } 50% { transform: rotate(360deg); } } </style> |
And click “Save.”
Step 2: Define Settings Schema
Next step is to define the configuration for the Shopify snowfall effect in the settings schema file.
In the left menu, search for “settings” and open the settings_schema.json file present inside the config folder.
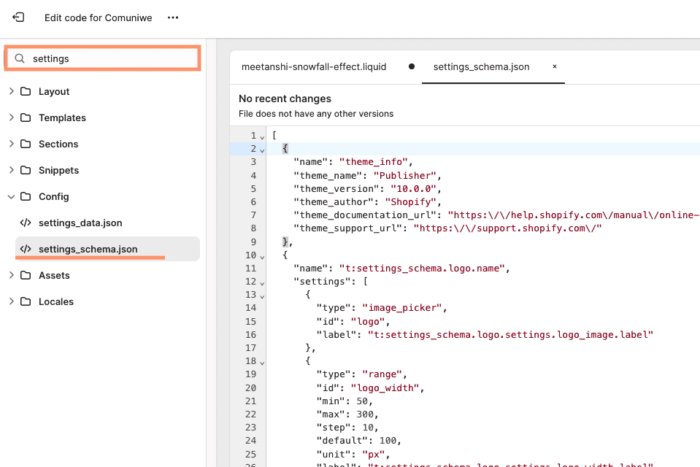
Now, copy the following code and paste it right after the first “[” square bracket:
|
1 2 3 4 5 6 7 8 9 10 11 12 13 14 15 16 17 18 19 20 21 22 23 24 25 26 27 28 29 30 31 32 33 34 35 36 37 38 39 40 41 42 43 44 45 46 47 48 49 50 51 52 53 54 55 56 57 58 59 60 61 62 63 64 65 66 67 68 69 70 71 72 73 74 75 76 77 78 79 80 81 82 83 84 85 86 87 88 89 90 91 92 93 94 95 |
{ "name": "Meetanshi Snowfall Settings", "settings": [ { "type": "select", "label": "Winter Mode", "id": "winter_mode", "default": "true", "options": [ { "value": "true", "label": "On" }, { "value": "false", "label": "Off" } ] }, { "type": "range", "label": "Number of Snowflakes", "id": "num_snowflakes", "default": 50, "min": 10, "max": 200, "step": 10 }, { "type": "range", "label": "Minimum Snowflake Size", "id": "min_snowflake_size", "default": 0.6, "min": 0.1, "max": 2, "step": 0.1 }, { "type": "range", "label": "Maximum Snowflake Size", "id": "max_snowflake_size", "default": 1.4, "min": 0.1, "max": 2, "step": 0.1 }, { "type": "select", "label": "Snowflake Type", "id": "snowflake_type", "default": "❄", "options": [ { "value": "❄", "label": "❄" }, { "value": "❅", "label": "❅" }, { "value": "❆", "label": "❆" } ] }, { "type": "color", "label": "Color 1", "id": "snowflake_color_1", "default": "#ffffff" }, { "type": "color", "label": "Color 2", "id": "snowflake_color_2", "default": "#f5fbff" }, { "type": "color", "label": "Color 3", "id": "snowflake_color_3", "default": "#e7f5ff" }, { "type": "range", "label": "Gravity", "id": "gravity", "default": 1, "min": 0.5, "max": 5, "step": 0.5 } ] }, |
And click “Save.”
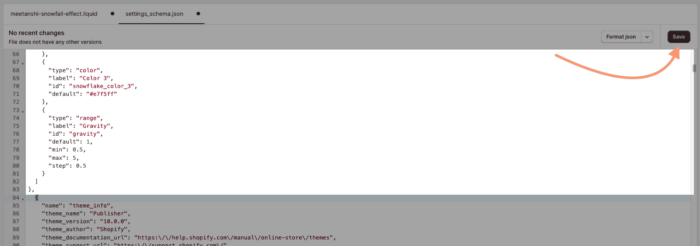
Note: Do not forget the comma (,) after the snowfall animation settings code.
Step 3: Render the Snowfall Snippet in the theme.liquid File
Now, add the snowfall snippet code to liquid file where you want to add the effect.
For e.g., if you want to add Snowfall effect on the entire Shopify store, you can add it to the theme.liquid file.
Copy the following code snippet:
|
1 |
{% render 'meetanshi-snowfall-effect' %} |
and paste it before the </body> tag as shown below.
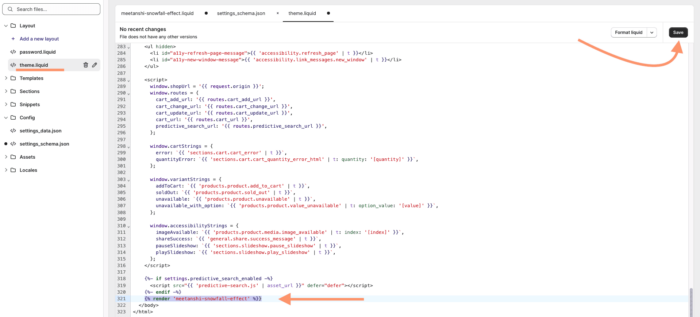
Click “Save.”
Step 4: Customize the Snowfall Effect in Shopify Theme Editor
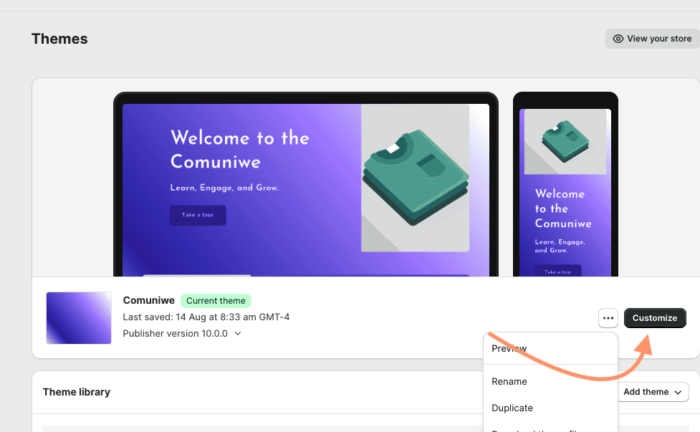
Go back to Sales Channels > Online Store > Themes and click “Customize.”
In theme customization, go to “Theme Settings” and expand the “Meetanshi Snowfall Settings” section. Here you can configure the Shopify Snowfall effect settings, such as:
- Switch the Winter mode on to add snowflakes effect to Shopify
- Set the number of snowflakes
- Set the minimum and maximum snowflake size
- Choose the type of snowflake
- Set up to three colors to use for snowflakes
- Change the gravity to increase/decrease snowfall velocity

Configure the settings and click “Save.”
Woohoo! You’ve successfully added a Shopify Snowfall effect without using any app. And you can also customize the effect as per your needs.
Here’s what the final result looks like:
That’s cool! Isn’t it? ☃️
Try this method to add snowflakes to your Shopify site and show your love in the comments.
Here are some other interesting reads for you:
- How to Add WhatsApp Chat Button to Shopify? [With & Without Coding]
- How to Add or Change Favicon in Shopify?


Prev
TheB.AI Platform: What It Is & How to Use It?
8 Best Shopify Omnichannel Apps
Next