How to Create a New Customer Account from Magento 2 Admin Panel
Users create an account on your store basically to manage purchase and order related activities. Most of the time, in Magento 2, customers create account from the frontend using the sign-up form. That’s a normal process of customer registration.
However, if an admin creates a customer account from the backend, a welcome email is automatically sent to the customer. To avoid confusion or redundancy in communication, it may be necessary to disable welcome email after creating a new customer from the admin panel. This can be achieved through the configuration settings in Magento 2’s backend.
There are times when because of the connectivity issue, website server problem, and many such reasons, customers unable to create their account from the store or frontend. In order to solve this issue, customers contact the admin and the admin creates a customer account from Magento 2 Admin Panel.
Also, the customers sometimes order the products over the call and the admin requires to create a new customer account from Magento 2 admin panel on his behalf and create an order from the Magento 2 backend.
Steps to Create a New Customer Account from Magento 2 Admin Panel
- Open Magento 2 Admin Panel. Look at Admin sidebar and visit: Customers > All Customers. Click on Add New Customer.

- Add the account related customer details
- In the Account Information area, you will see Associate to Website option (in case if you have multisite installation) and set the website.
- If you have created Customer Groups, you can allocate in the next form area.
- Feel free to select the checkbox if you are using VAT ID Validation and want to Disable Automatic Group Change Based on VAT ID.
- Write down the customer details in the required fields like First Name, Last Name, Email.
- Complete the optional details if needed.
- Enable Send Welcome Email from to the store view from which the Welcome email will be sent to the customer. If the store contains views for different languages, it will determine the language of the Welcome email.
- If you have enabled the Vertex Cloud, enter the Vertex Customer Code that you want to use for the customer.
- Click on Save and Continue.
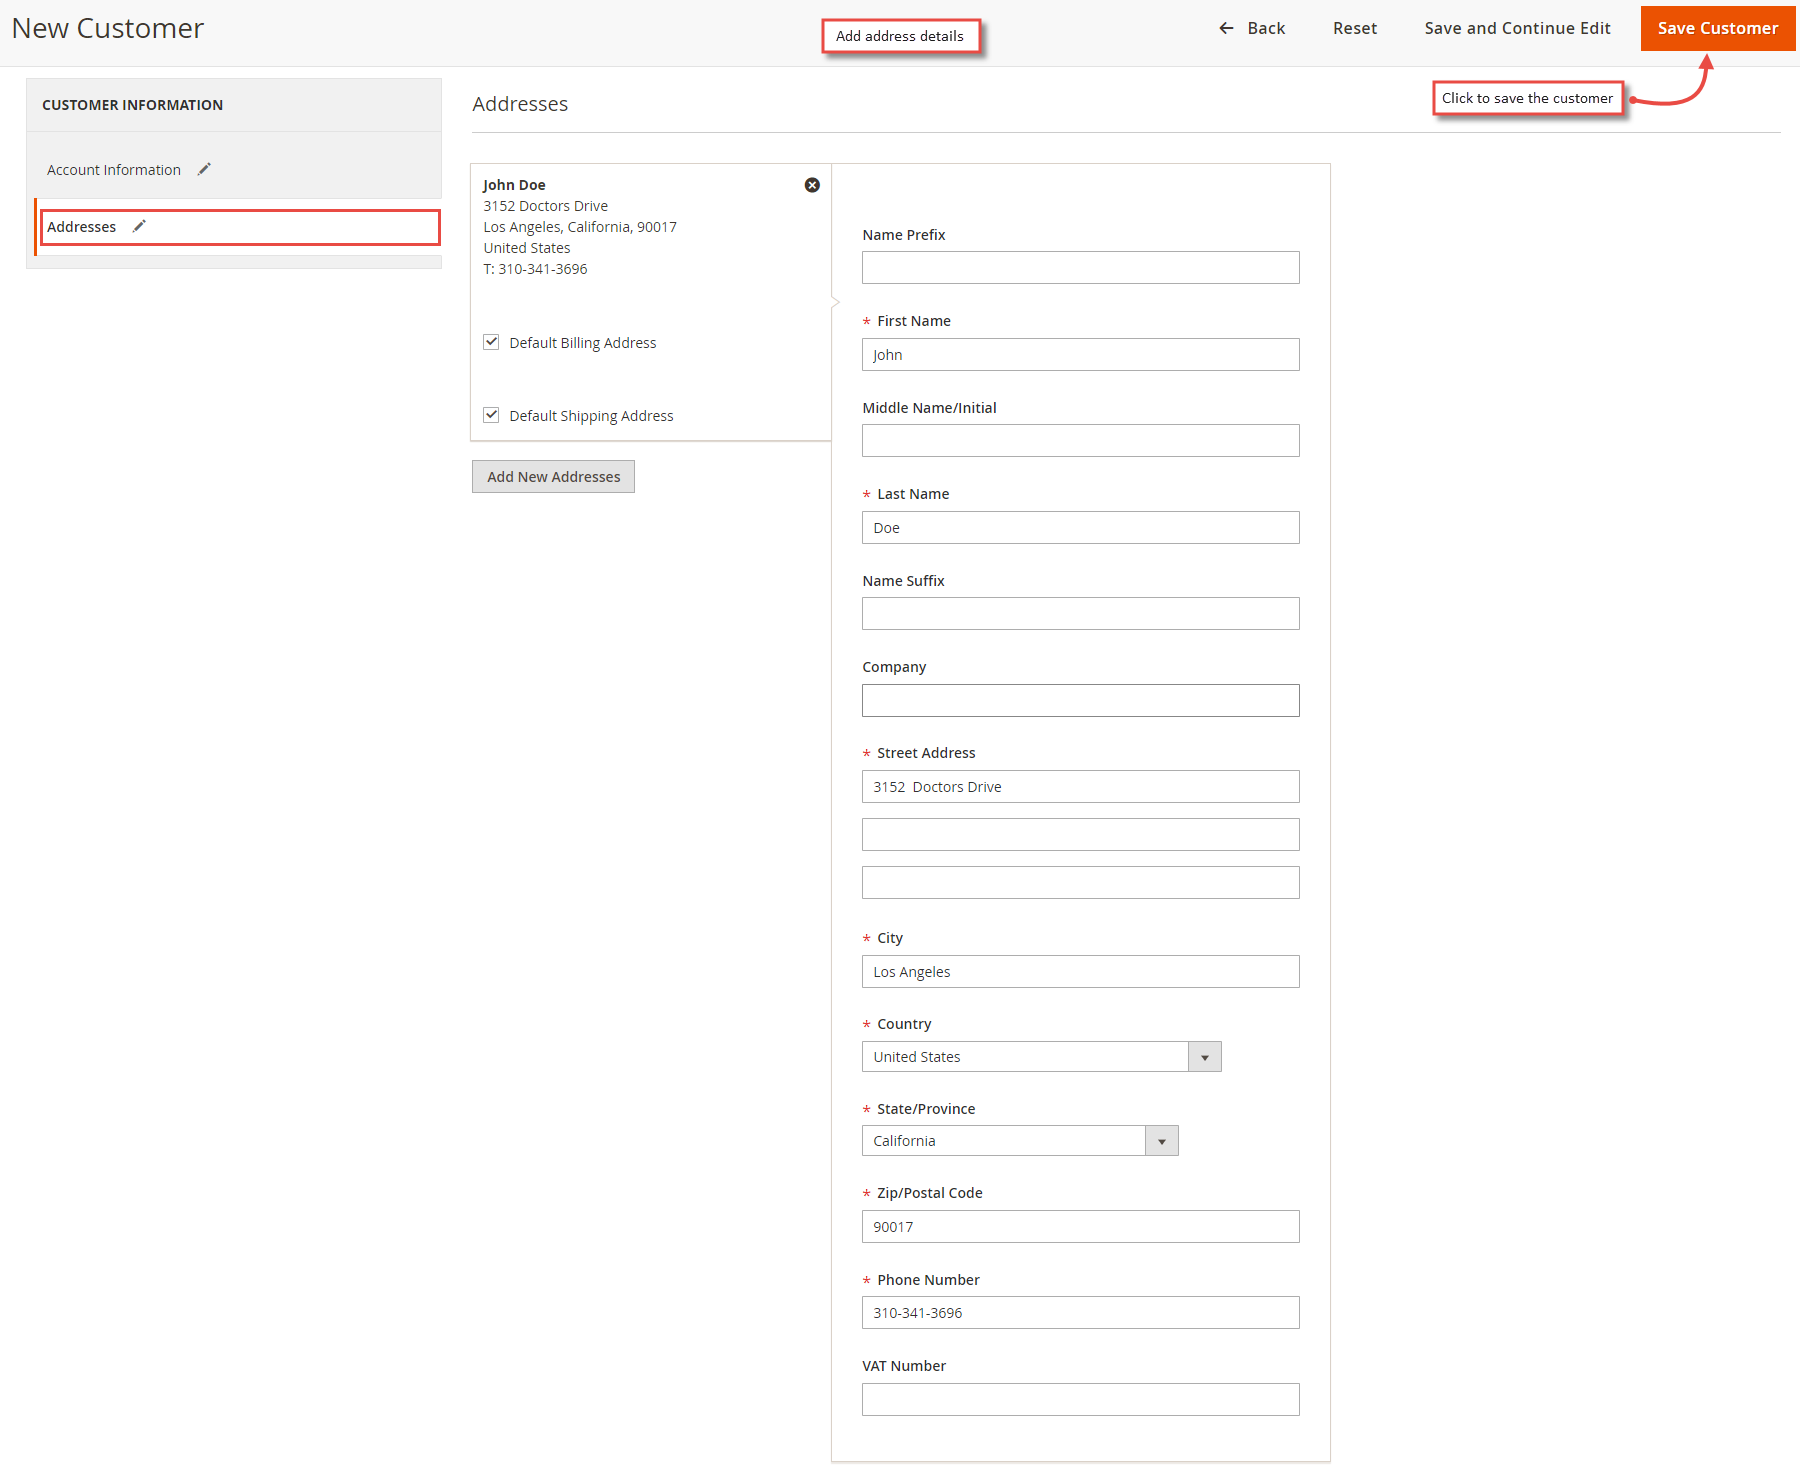
- Enter the address details
- Choose Addresses and click Add New Addresses.
- Write down the billing address and shipping address as per customer details.
- Scroll down and enter the required details for the address.
- Enter the customer mobile number for this address.
- Enter the VAT Number of the customer, if applicable.
- Click on Save Customer.
- Reset the password
While creating an account from the Magento 2 Admin Panel, customers do not get the password. Make sure to set up a strong password.
To set a password…
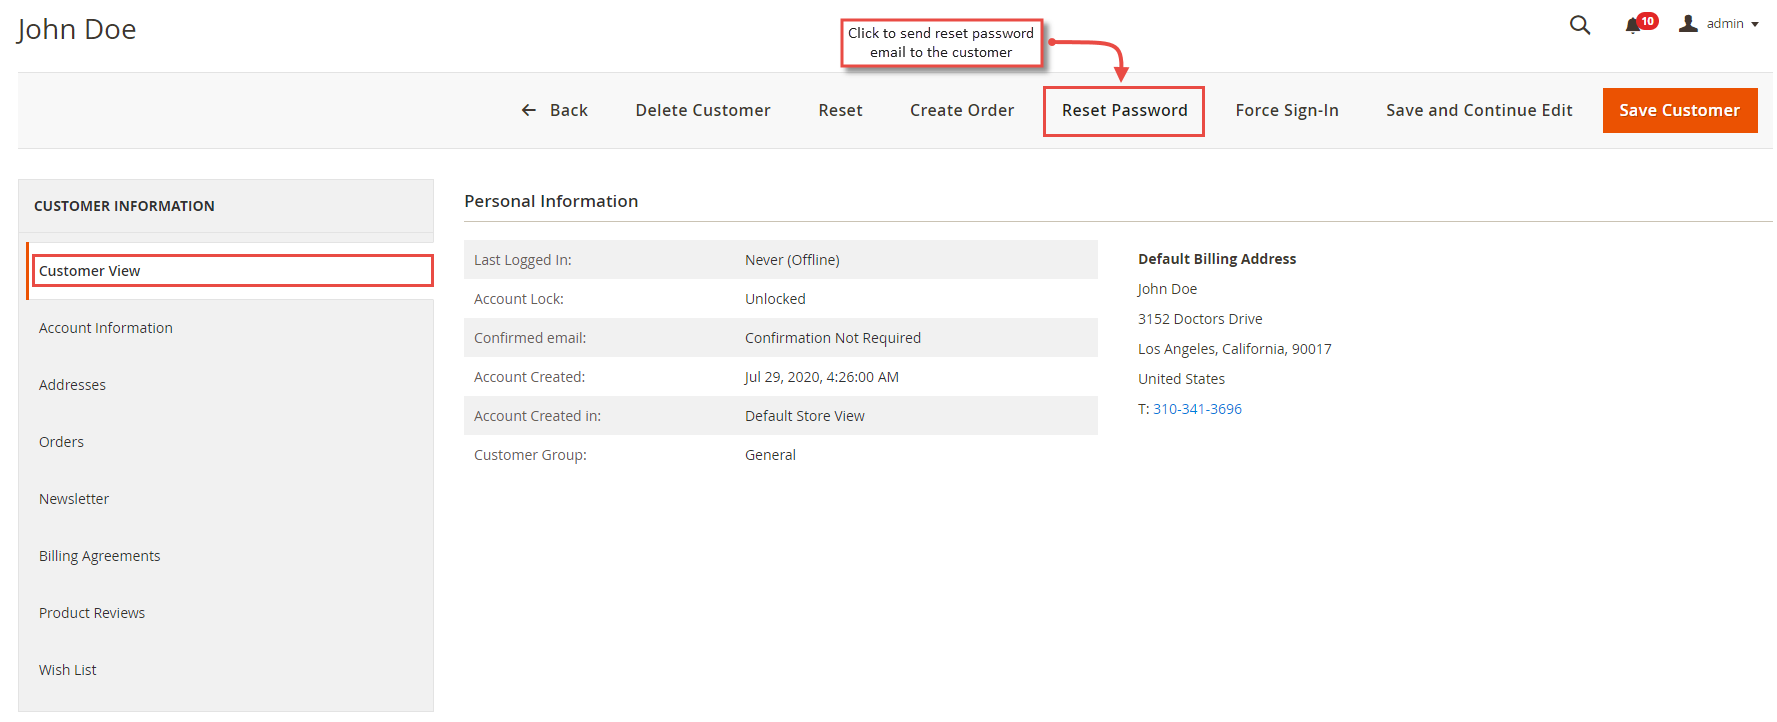
- Find the new customer account in grid
- In the Action column, click on Edit.
- Click on Reset Password at the top of the menu bar.
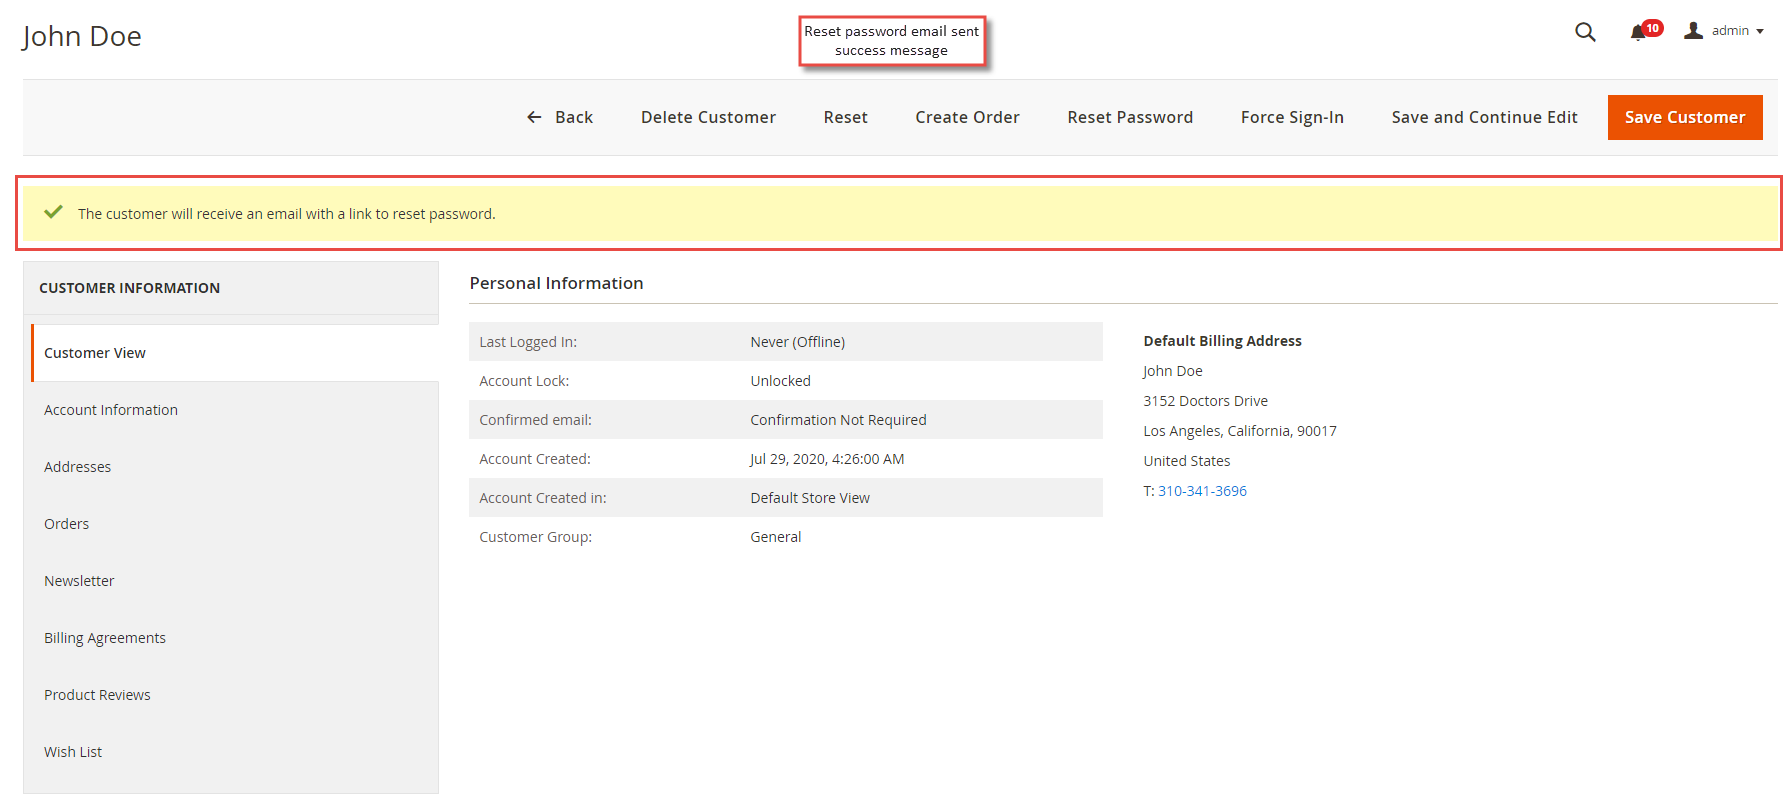
- Notifications will be sent to the account owner regarding the account creation and password.
This is how you can create a customer account from Magento 2 Admin Panel. As developers, we love adding things programmatically. So, you can Create Customers Programmatically in Magento 2 if you have to add customers in bulk.

You can also use Magento 2 API to create new customer if you are developing a third-party application or mobile app for your online store.
If you have any questions regarding this blog, feel free to ask in the comment section below.
I would love to solve your problems.
Thank you!
Also Read:
Shivbhadrasinh Gohil
Shivbhadrasinh is the Co-founder & Chief Marketing Officer at Meetanshi. He leads the marketing team and is the person behind the marketing & branding success of the company. Being a seasoned digital marketer, he has been consulting online businesses for growth since 2010 and has helped 100+ clients with digital marketing success.
He loves sharing tips and insights about the latest digital marketing trends aimed at helping online business owners.


![Magento vs Opencart – Which One is Best For You? [2022]](png/magento-vs-opencart-%e2%80%93-which-one-is-best-for-you.png)


Prev
How to Set up GTM (Google Tag Manager) for Magento 2
[Solved] Syntax Error – Unexpected ‘)’ While Installing Magento 2.4
Next