How to Configure Magento 2 Stores and Time Zones
Magento 2 CMS is a popular platform for online business. It is not limited based on the location. However, stores in different countries have to be configured based on their time zones, location, week format, tax rules, etc. The default Magento 2 offers options to configure Magento 2 stores and time zones.
These settings help to configure the store based on the time zone of its country. Also, certain shipping options are dependent on the location. I’ll show you how to configure these settings in the stepwise tutorial!
Method to Configure Magento 2 Stores and Time Zones:
- Login to Admin Panel
- Navigate to Stores > Configuration
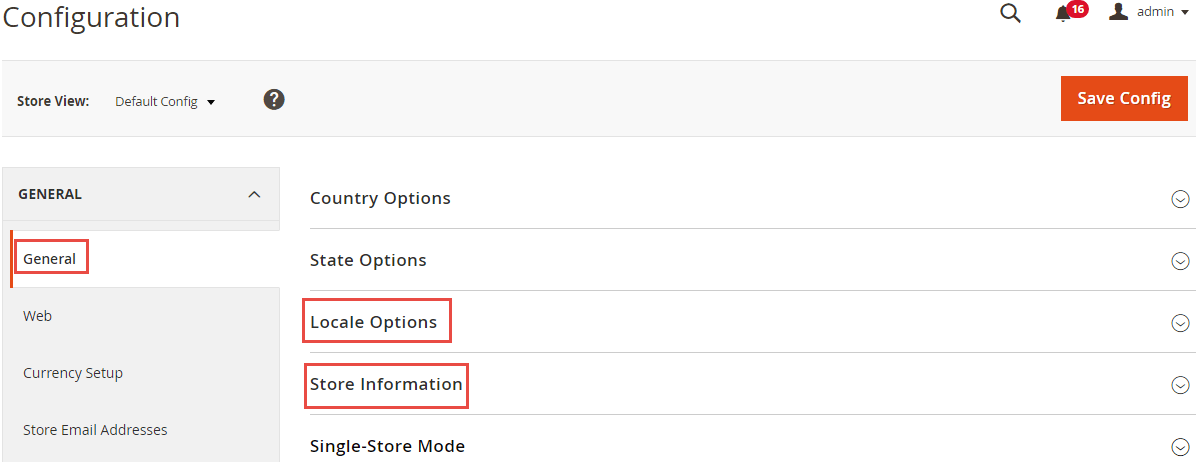
- From the left side navigation menu, select the General tab under the General menu. Here you’ll find the locale and store information dropdown menu.

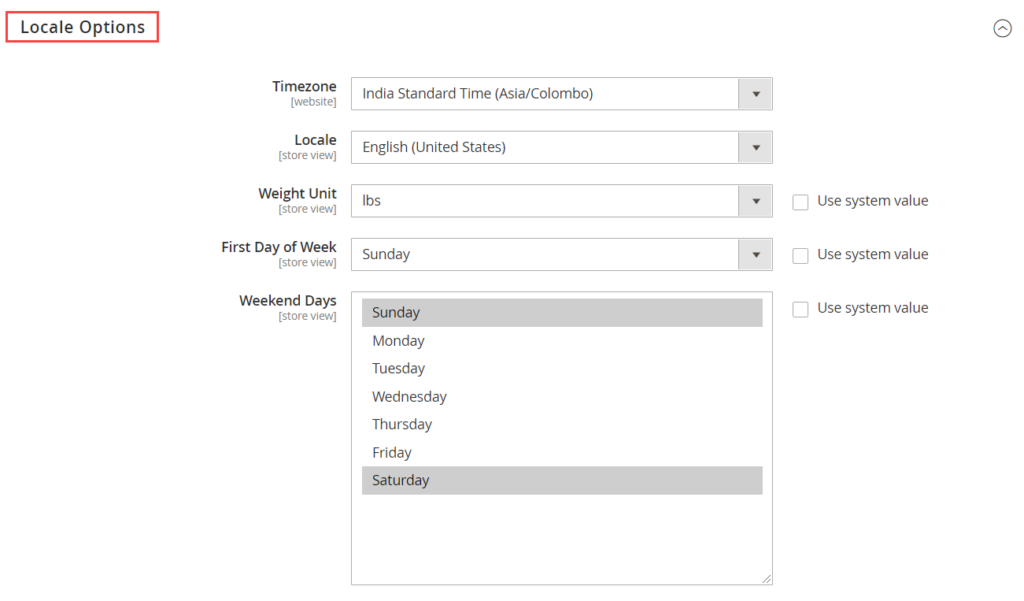
- Expand the locale drop-down option and configure the below settings

- Time Zone – Set the time zone of the store
- Locale – Choose the language of your store’s country.
- Weight Unit – Select the unit of weight used in the country.
- First Day of the Week – Select the first day of the week that is considered as per the country’s standards for the store.
- Weekend Days – Select the weekends that are considered as per the country’s standards for the store.
- Save the configuration and clear cache.
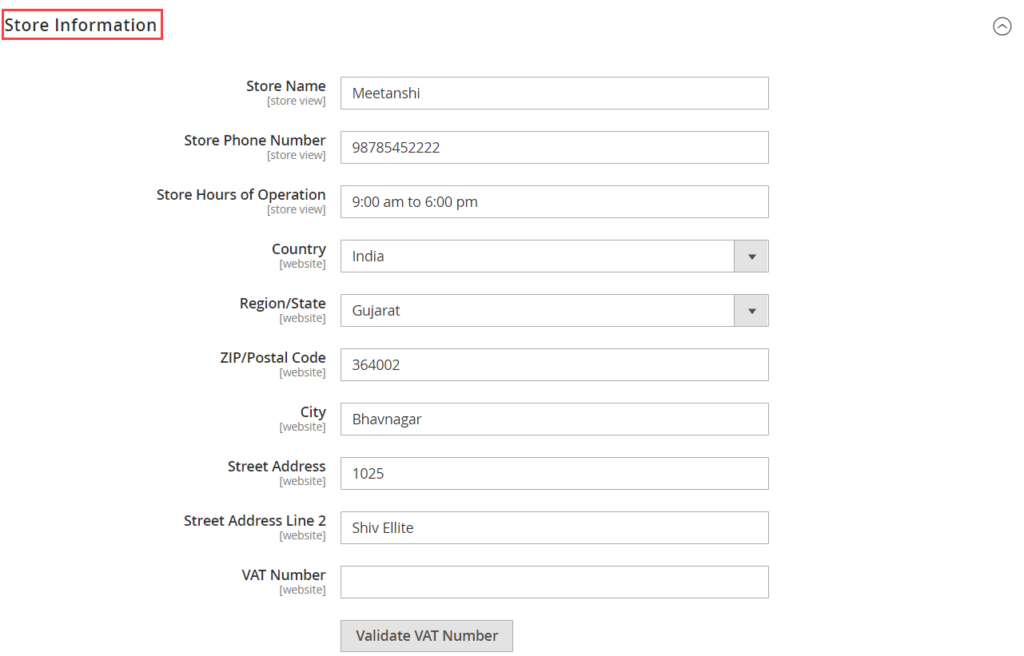
- Moving on to the Store Information drop-down menu, configure the settings as shown in the figure:

- Store Name – enter the name of the store
- Store Phone Number – Enter the contact number of your store.
- Store Hours of Operation – define the store’s hours of operation
- Country – select the store’s country
- Region/State – enter the state where your store is located
- ZIP/Postal Code – enter the zip code of your store’s city
- City – enter the store’s city.
- Street Address – enter the store’s address
- Street Address Line 2 – use this field, if required, to enter the remaining or elaborate address.
- VAT Number – Enter the VAT number of your store to ensure errorless VAT calculation.
- Save the configuration
- Navigate to System > Cache Management > Flush Magento Cache and clear the cache
That’s it!
Follow the above steps and configure the Magento 2 stores and time zones based on its location.
The method is very easy to follow, however, any doubts in the process are welcome in the Comments section below ?
Do rate the post with 5 stars if found useful 🙂
Thank You.
Sanjay Jethva
Sanjay is the co-founder and CTO of Meetanshi with hands-on expertise with Magento since 2011. He specializes in complex development, integrations, extensions, and customizations. Sanjay is one the top 50 contributor to the Magento community and is recognized by Adobe.
His passion for Magento 2 and Shopify solutions has made him a trusted source for businesses seeking to optimize their online stores. He loves sharing technical solutions related to Magento 2 & Shopify.


Prev
How to Password Protect Your Magento Store With .htaccess
Magento 2 Sage Pay Integration – Meetanshi Extension Explained
Next