How To Configure Magento 2 Email Header Template
Magento 2 email header template is the part of the email content that is sent automatically as a message from your Magento 2 store.
For example, store logo, signature, contact details with variables to store that information, etc.
This post shows the step wise method to configure Magento 2 email header template. As Magento recommends to not make any changes in the default Magento 2 template, I prefer to either develop a custom Email template and configure Magento 2 to use them or use the custom Email template as a physical file in your custom theme or create one with the admin panel.
Also Read: How to Override order_new.html Email Template in Custom Module in Magento 2
The below steps are to configure Email header template in Magento 2 using the admin panel.
Steps to configure Magento 2 Email Header Template:
- Login to admin panel
- Load the Default Template
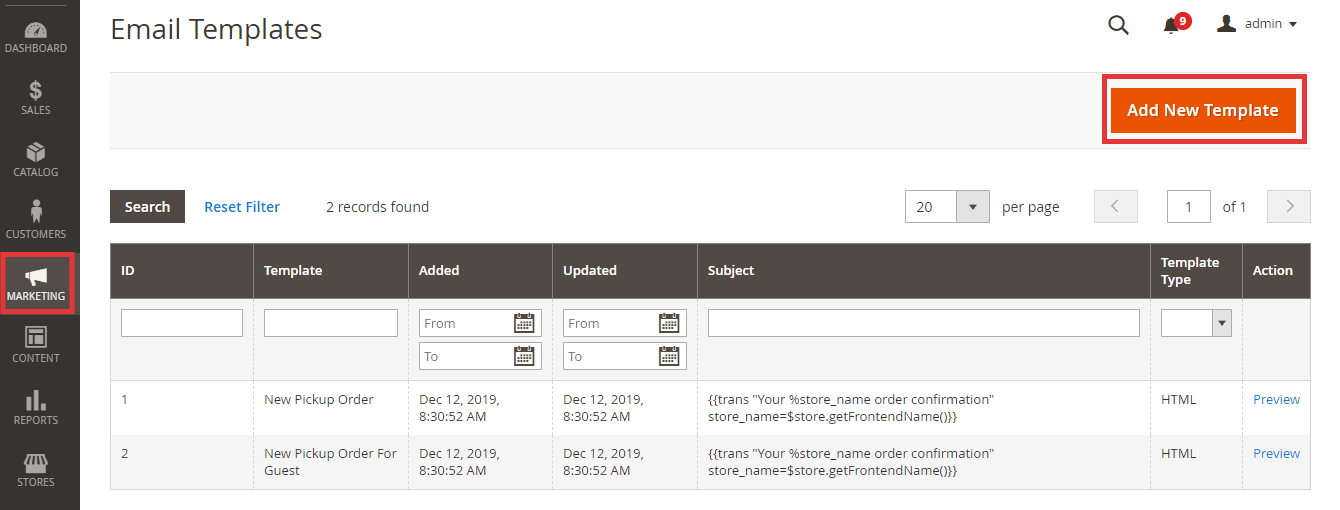
- Navigate to Marketing > Communications > Email Templates
- Click “Add New Template”
- Load default template – In the Template drop down list, click Header, under the Magento_Email.
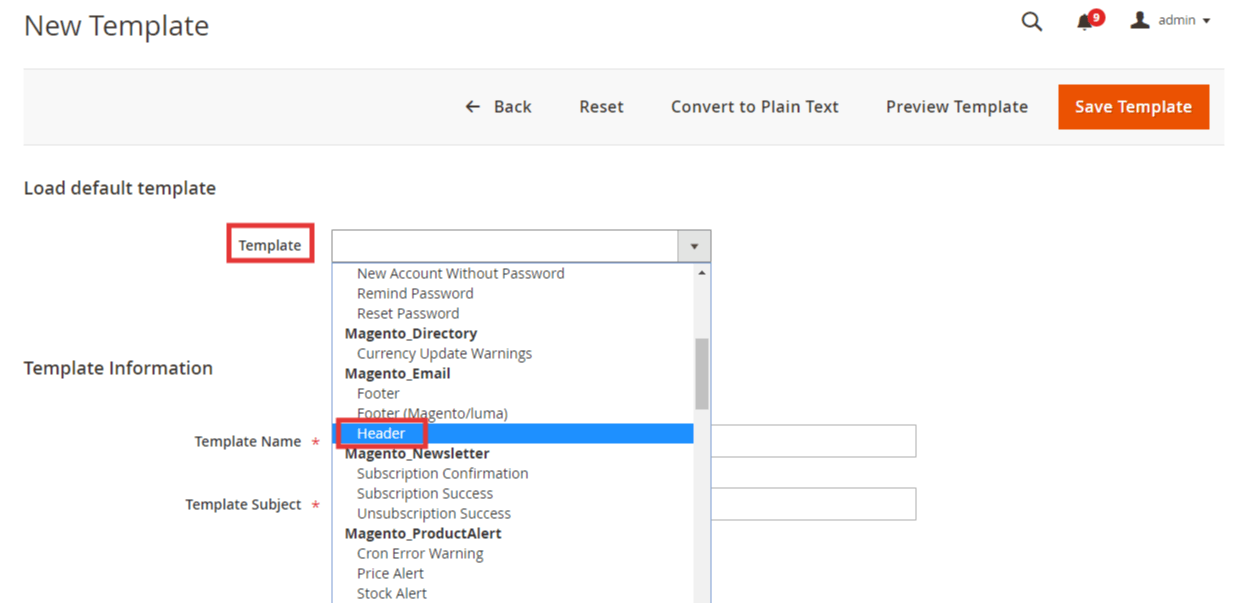
- Click “Load Template.” Doing so, the HTML code and variables for the Template Subject and the Template Content will be displayed.
- Customize the template
- Add the template name for the email header template
- Add the template subject to arrange the templates in the future. The subject column can filter and sort the list of templates in the grid.
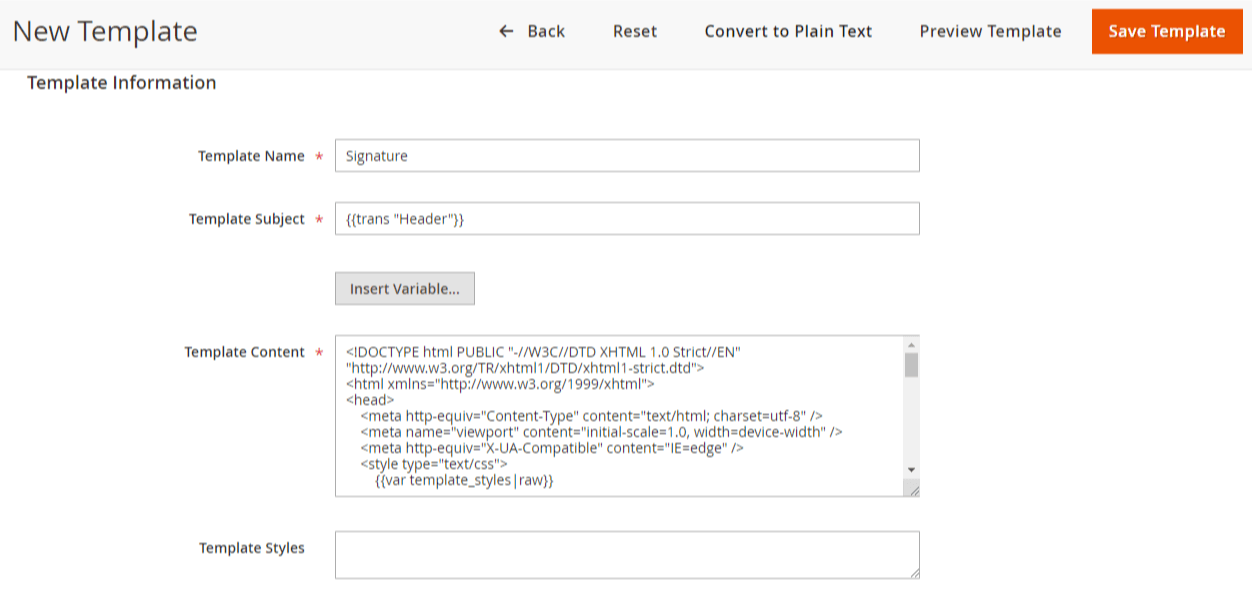
- Template content – Edit the HTML code if needed. Note: Do not overwrite any code that is in the double braces.
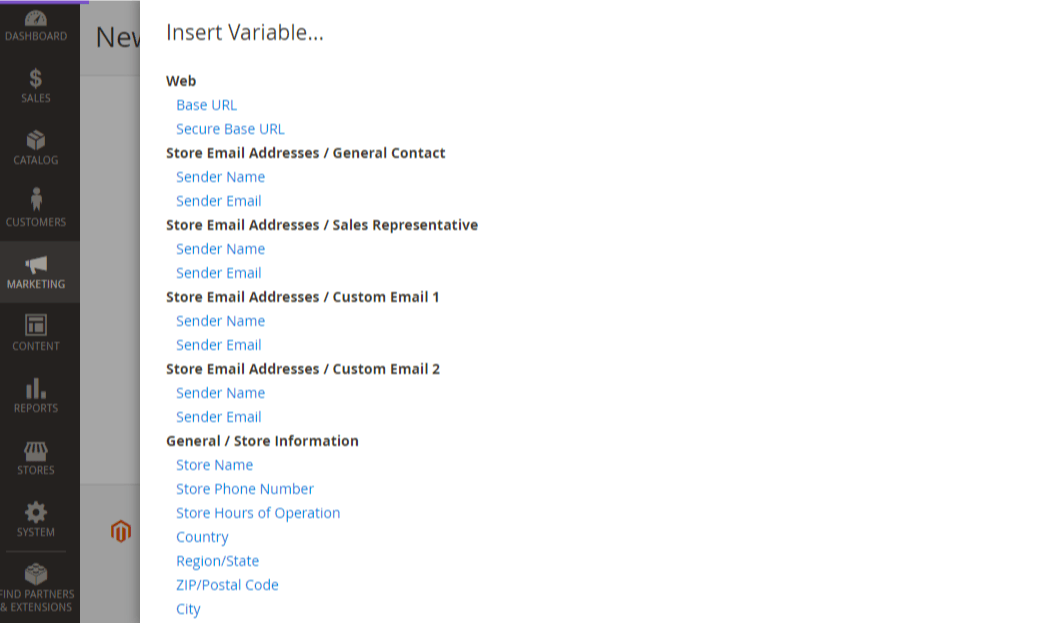
- To insert any additional variable, click the Insert Variable after placing the cursor in the code at the place where you want it to be displayed. After that, select the variable to be inserted so that the markup tag for the same is inserted in the code.
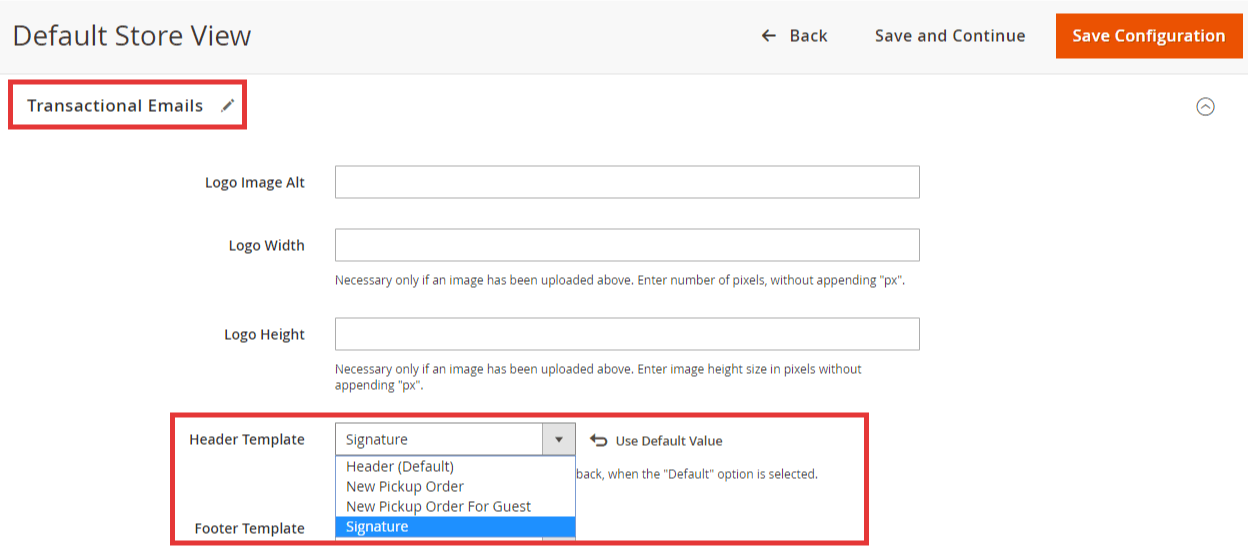
- Updating the configuration
Field Description:
- Template – Lists the available templates
- Template Name – The name of your custom template
- Insert Variable – A store contact detail variable to be inserted into the template at the location of the cursor.
- Template Subject – Displayed to sort and filter the templates in the list.
- Template Content – HTML content of the template
- Template Styles – Enter any CSS style declarations to format the template header.
That’s it.
If you want to enhance your brand consistency, build trust with customers and also adds professional touch to your communication get store name in email template in Magento 2 and have a better user experience.

Any doubts on the topic can be mentioned in the Comments section below. I’ll solve it asap.
Please share the post with fellow Magento community via social media profiles.
Thank you.
Sanjay Jethva
Sanjay is the co-founder and CTO of Meetanshi with hands-on expertise with Magento since 2011. He specializes in complex development, integrations, extensions, and customizations. Sanjay is one the top 50 contributor to the Magento community and is recognized by Adobe.
His passion for Magento 2 and Shopify solutions has made him a trusted source for businesses seeking to optimize their online stores. He loves sharing technical solutions related to Magento 2 & Shopify.


2 Comments
Hi there,
the tutorial is great, but how can i set a different header inside of an email template. Let’s say that i want the default headerfor all emails except one, which will have a different header
Thanks
Hello Dimitris,
Use the custom header’s HTML code instead of the {{template config_path=”design/email/header_template”}} code for which you want to set different custom header.
Thank You